herbat73.github.io
IT How-To Guides
3. Liferay installation
Download Liferey 7.0 with installation with tomcat boundle for example you can use wget tool
after download you can see zip in your current folder, type
ls
to see zipped file
liferay-ce-portal-tomcat-7.0-ga3-20160804222206210.zip
Install unzip tool
sudo apt install unzip
and unzip zip file
unzip liferay-ce-portal-tomcat-7.0-ga3-20160804222206210.zip
After uncompressing zip file you can enter liferay home folder
cd liferay-ce-portal-7.0-ga3
Create portal-ext.properties in liferey home folder
nano portal-ext.properties
add portal settings lines and ajust boleded text to your specific situation
admin.email.from.address=foo@bar.com
admin.email.from.name=Foo Admin
jdbc.default.driverClassName=com.mysql.jdbc.Driver
jdbc.default.password=ThiSISPassword.
jdbc.default.url=jdbc:mysql://localhost/lportal?characterEncoding=UTF-8&dontTra$
jdbc.default.username=root
liferay.home=/home/myuser/liferay-ce-portal-7.0-ga3
setup.wizard.add.sample.data=on
setup.wizard.enabled=false
##
## Redirect
##
#
# Set this property to "ip" or "domain" for the redirect security method. If
# set to "domain", the portal will only redirect users to domains listed in
# the property "redirect.url.domain.allowed". If set to "ip", the portal
# will only redirect to domains whose IP address resolve to an IP address
# listed in the property "redirect.url.ip.allowed".
#
redirect.url.security.mode=domain
#redirect.url.security.mode=ip
#
# Input a list of comma delimited domains which the portal is allowed to
# redirect to. Input a blank list to allow any domain.
#
redirect.url.domains.allowed=
#
# Input a list of comma delimited IPs which the portal is allowed to
# redirect to. Input a blank list to allow any IP. SERVER_IP will be
# replaced with the IP of the host server.
#
redirect.url.ips.allowed=127.0.0.1,SERVER_IP
Save it. This way you will say to liferay which database you are using and setup admin user.
Go to tomcat bin folder
cd tomcat-8.0.32/bin
Default installation of Liferay is setup for use 1G memory. Typical sever has much more so if you want to really us it edit the memory serttings before you start the Liferay server. You can edit the setenv.sh file
nano setenv.sh
and modify Xmx and MaxPermSize parameters for example
… -Xmx2048m -XX:MaxPermSize=512m”
Save it and start the server
sudo ./startup.sh
You can see how server is starting in log file, type
tail -f ../logs/catalina.out
The server will take some time depends of your server performace (30..2 min) and at the end you will see some like
...
Server startup in 177357 ms
You can enter ip adres in your browser to validate server installation. It will use port 8080 by default so you need to enter like
http://yourServerIPAdress:8080/
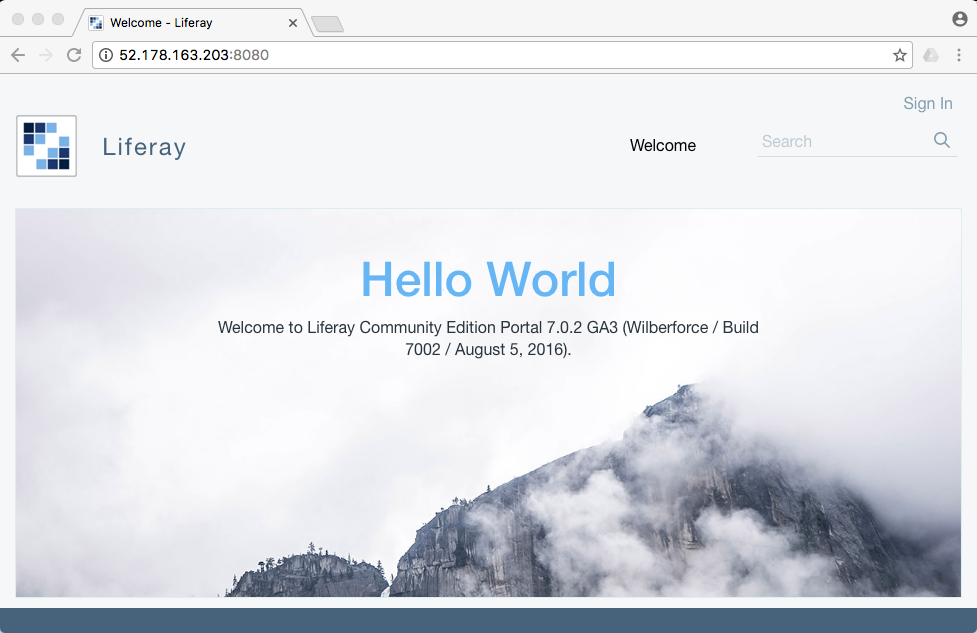
You can start first login by using user test@liferay.com with password test
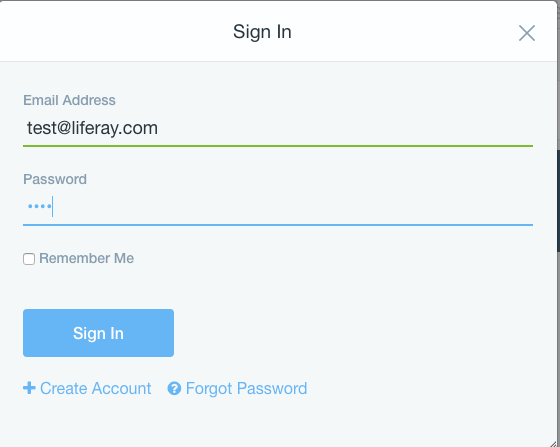
Accept Terms of use and change default password.